

Black, White, Violet, Aventurine Lampwork Flat Circle 25mm
11/0 Transparent Violet Rocaille Seed Beads
10/0 Iris Magenta Rocaille Seed Beads
Light Violet and Clear Diamonds 9x8mm
Alexandrite Picasso Props 8x6mm
White with Purple Haze Full Coating Faceted Rounds 4mm
Clear with AB, Brown and Pearl Coatings Faceted Rounds 6mm
Fuchsia Leaves 12x7mm
Purple Haze Leaves 12x7mm
Copper Twisted Ovals 9x6mm
Magic Blue Round 8mm
Working with pleated silk shibori ribbon and bead embroidery is becoming increasingly more popular. Here's how you can get started, making a free-form cuff bracelet. No two pieces will ever turn out exactly the same when you work in this style, but as you follow through the instructions here, you will see all the basic steps that will give you success in working with this beautiful material. (Stitch instructions may be found in free e-book chapter of Every Bead Has a Story by Cyndi Lavin)
Step 1
Choose a metal cuff and create a paper pattern from it (just as a rough guide). I have added a thin layer of cotton batting to my cuff with adhesive, but this is optional. Cut a piece of foundation fabric that is at least 1/2 inch bigger on each side than your pattern. Iron a lightweight piece of fusible interfacing to the back of the foundation fabric.

Step 2
Trace around your paper pattern on the interfacing side. This is still just a rough guide: you can bead well past this edge if you wish, and in any event, the piece is likely to shrink up a bit from your stitching as you work (hence the extra fabric around the edges).

Step 3
Use pins on the front to roughly mark out the area for ribbon placement.

Play with the ribbon, letting it loop and fold and fan out until you are satisfied with the arrangement. Roll under the edges and take tiny stitches all around the outside. Also take some stitches in the middle to keep the ribbon where you want it. Usually I would use white thread, but I wanted you to be able to see it. The edges will be covered later and any interior stitches that show can also be covered by beads.

Step 5
Here is what my ribbon looks like before bead embellishment begins.

Step 6 Stitch a peyote stitch bezel around your focal bead or cabochon.

Step 7
Outline one edge of the ribbon using back stitch, and adding occasional accent beads if desired.

Step 8
Stitch along the other long edge, and begin adding decorative stitching to each edge as desired. Use the pattern drawn on the back as a rough guide for your beading, but don't be afraid to extend it past the edge.

Step 9
Add back stitched beads judiciously to the folds of the shibori ribbon. Try to avoid over-embellishing, but do cover any tacking stitches that show.

Step 10
Bead across the short edges at each end of the bracelet.

Step 11
Trim the top carefully, leaving a margin around the edge for adding a beaded edge. Use adhesive or tape to temporarily attach the top to the metal cuff. Add a piece of ultra-suede fabric to the back and cut it to match the top. Baste the two fabric pieces together temporarily, stitching as close to the edge of the metal cuff as you can.
Step 12
Using edging brick stitch, add a beaded border the entire way around the edge of the cuff. I used size 10/0 seed beads.

Step 13
Add a short stack stitch to each edging stitch. I used size 15/0 seed beads for this.

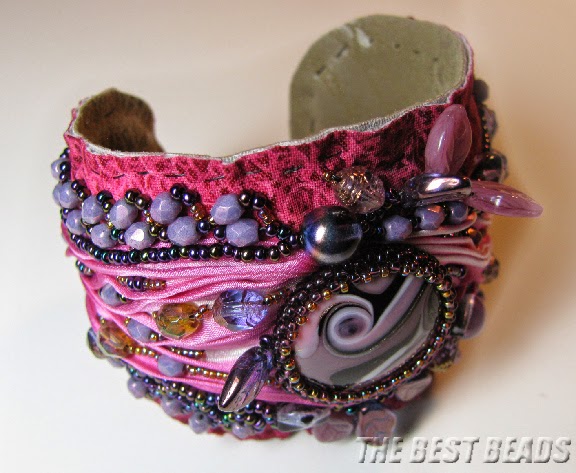
Bracelet is finished!


Tutorial is provided by Cyndi Lavin
No comments:
Post a Comment